
GC Connect - User Set Up
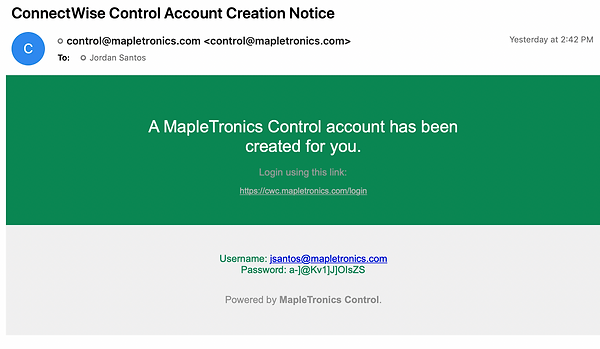
Step 1: After set up is done users who are enrolled will receive an email from control@mapletronics.com to their inbox with a link to the platform as well as their username and temporary password. Click the link and sign in with the given credentials.

Step 2: After using the temporary password you will be prompted to change your password. Follow the instructions and set the password to a secure password that you will remember.

Step 3: After changing your password you will be taken back to the login screen. Login with your username and newly set password.

Step 4: You will then receive another email from control@mapletronics.com with a temporary one time password. Enter this one time password in and select login. *select remember this device to not have to re-authenticate with each login.

Step 5: Now you are logged into the GC Connect Portal and ready to begin a remote session into your on site device. Choose the correct device under the My Assigned Machines panel. Make sure the computer icon is green. If it is gray, your on site machine is turned off. It must be turned on to continue.

Step 6: With the device you are wishing to login to selected, click join. You have now begun your remote session.

Step 7: Select ctrl+alt+delete and enter your on-site device login credentials just like logging in to your on site computer. Use your normal credentials to login to your device.

Notes:
– While using a remote session keep in mind that what you are doing during your remote session will be visible on your physical monitor that you are accessing. To change these settings click on the lightning bolt icon at the top of your screen.
From here you will see options to block guest input or block guest monitor.
-
Block guest input will keep your screen visible at your on-site device but will block guest's keyboard and mouse control.
-
Block guest monitor will black out the screen on-site to keep anyone from seeing or accessing anything you are doing during your remote session.

– If your on-site device has more than one monitor connected you can use the monitor settings to choose which monitor you'd like to view or have them combined into one view.
Step 8: When you are done with your remote session be sure to log out just as you would on your on-site device.

OR CALL US AT 1.800.358.7447